15 Pottery Painting Ideas That Actually Work (With Supplies)

This post contains affiliate links. As an Amazon Associate, I earn from qualifying purchases at no extra cost to you.
You bought plain ceramics. Now they’re sitting on your shelf looking… boring. The good news? A few paint techniques can completely transform pottery into pieces people actually want to buy, gift, or display. These 15 pottery painting ideas go from beginner-friendly to impressively detailed — and every supply you need is linked directly below each technique.
Before You Start: The 3 Supplies Every Painter Needs
No matter which technique you choose, these three items are non-negotiable:
- Ceramic-safe paint — regular acrylic flakes off. Use paint labeled for ceramics or bisqueware.
- A sealer or glaze — protects your work and makes colors pop.
- Quality brushes — a detail brush + a flat brush covers 90% of techniques.
➡️ Shop complete ceramic paint sets on Amazon →
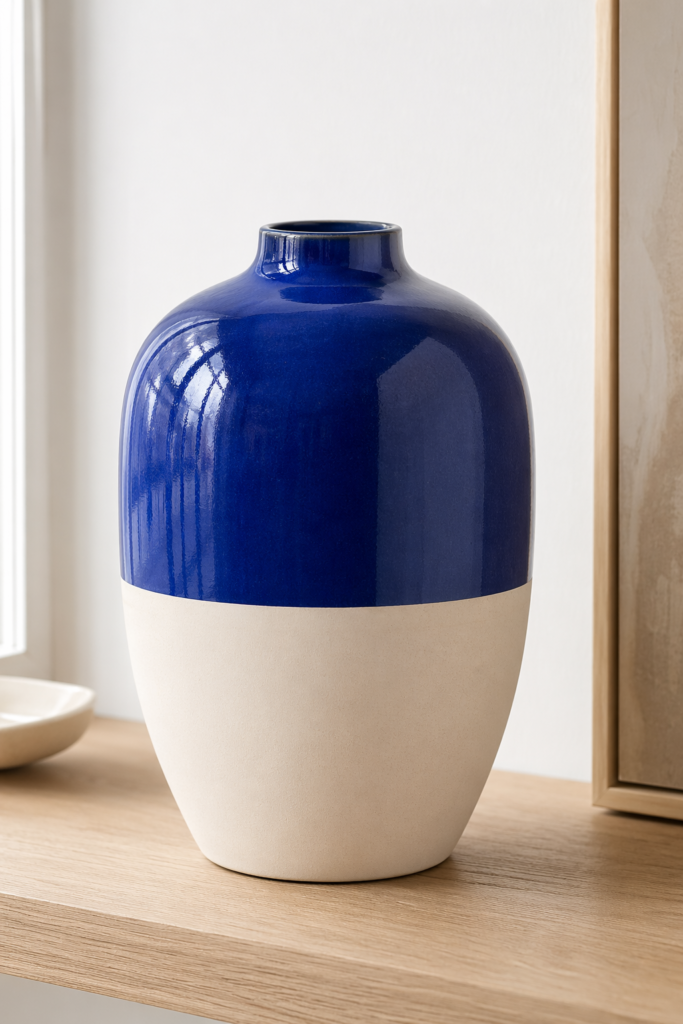
1. Bold Color Blocking
Color blocking is the fastest way to make ceramics look intentional and modern. Divide your piece into two or three sections using painter’s tape and fill each with a solid color — think cobalt blue + cream, or terracotta + sage green. No artistic skill required, just clean edges and bold choices.
Best for: vases, planters, mugs
Pro tip: Use matte colors on the bottom half and glossy on top for a two-finish contrast that looks incredibly high-end.
What you need:
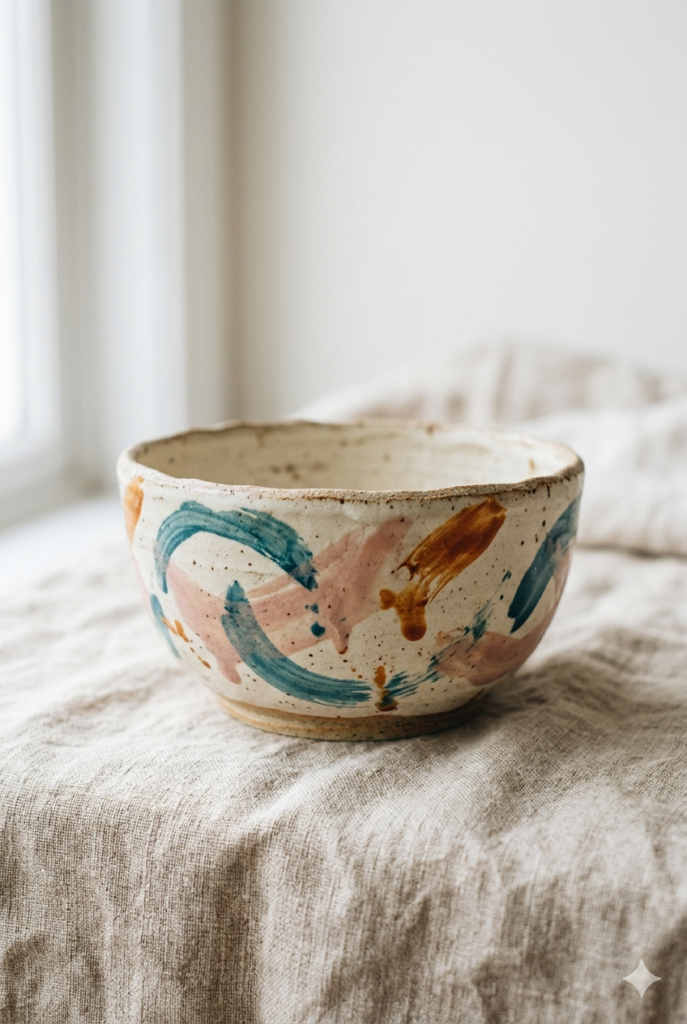
2. Abstract Brush Strokes
Loose, expressive brushwork turns ceramics into functional art. Load your brush with teal, blush pink, or burnt orange and drag it across the surface in confident sweeping motions. Don’t overthink it — the “imperfect” look is the entire point.
Best for: bowls, plates, decorative trays
Pro tip: Layer two colors while the first is still slightly wet to create natural blending at the edges. Avoid mixing more than two colors or it turns muddy.
What you need:
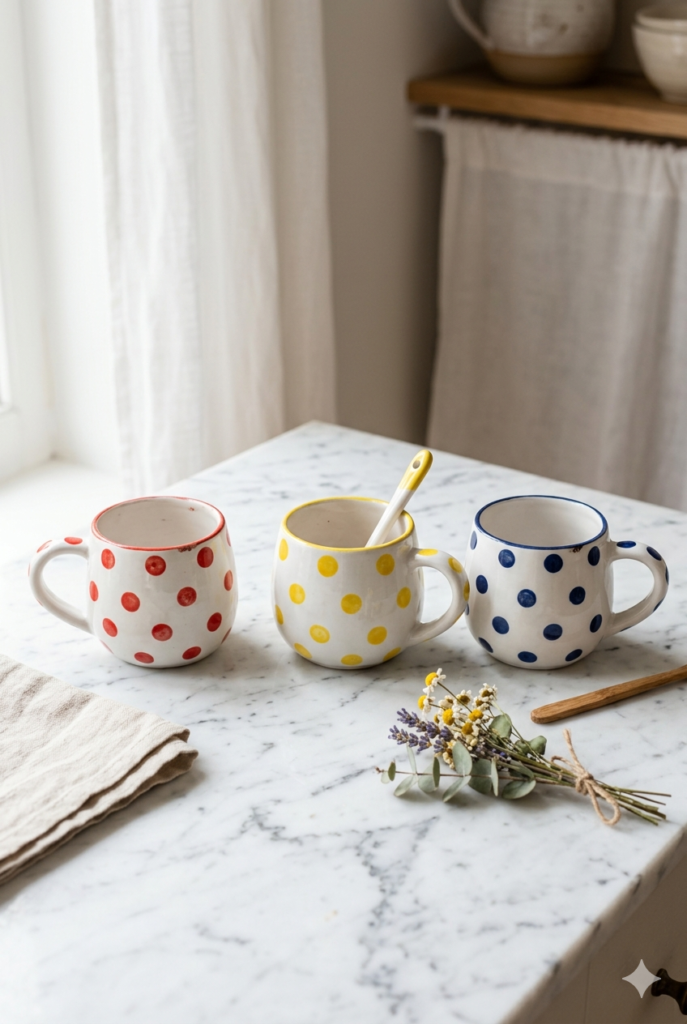
3. Polka Dots and Geometric Patterns
Dots are beginner-friendly, endlessly versatile, and satisfying to make. Use a dotting tool (or even the eraser end of a pencil) to create uniform dots in patterns — rows, clusters, or random scatter. Combine two contrasting colors for maximum visual impact.
Best for: mugs, small planters, candle holders
Pro tip: Lightly sketch your pattern with a pencil first. Pencil marks disappear under paint but save you from uneven spacing.
What you need:
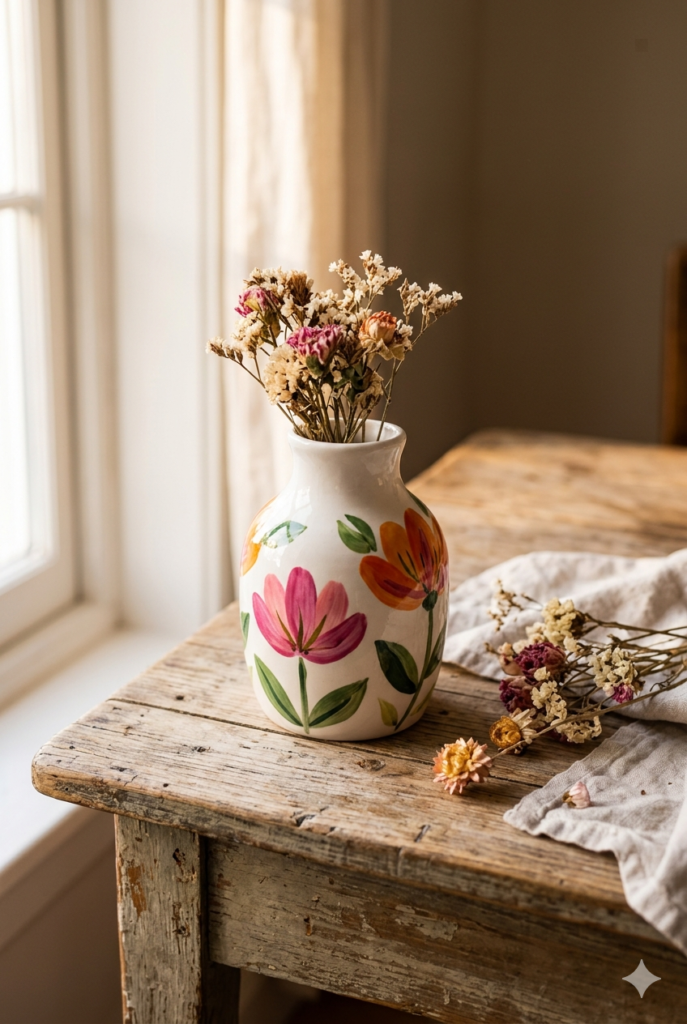
4. Hand-Painted Florals
Florals are the most pinned ceramic style for a reason — they’re timeless, giftable, and look impressive even when imperfect. Start with simple five-petal shapes, add a center dot, and build up leaves around them. Use bright, saturated colors over a white base for maximum contrast.
Best for: vases, plates, decorative bowls
Pro tip: Paint petals from the outside in, lifting your brush at the tip of each stroke. This natural taper gives petals their realistic shape.
What you need:

5. Personalized Names and Quotes
Personalized ceramics are the #1 best-selling category in handmade gifts. A name, a short quote, or an initial on a mug transforms a $3 piece into a $25 gift. Use paint pens for consistent lettering, or try stencils if freehand isn’t your thing.
Best for: mugs, plant pots, keepsake dishes
Pro tip: Always do a test run on paper first. Practice the lettering 5-10 times before touching the ceramic — confidence in your strokes makes the difference between “handmade” and “homemade.”
What you need:
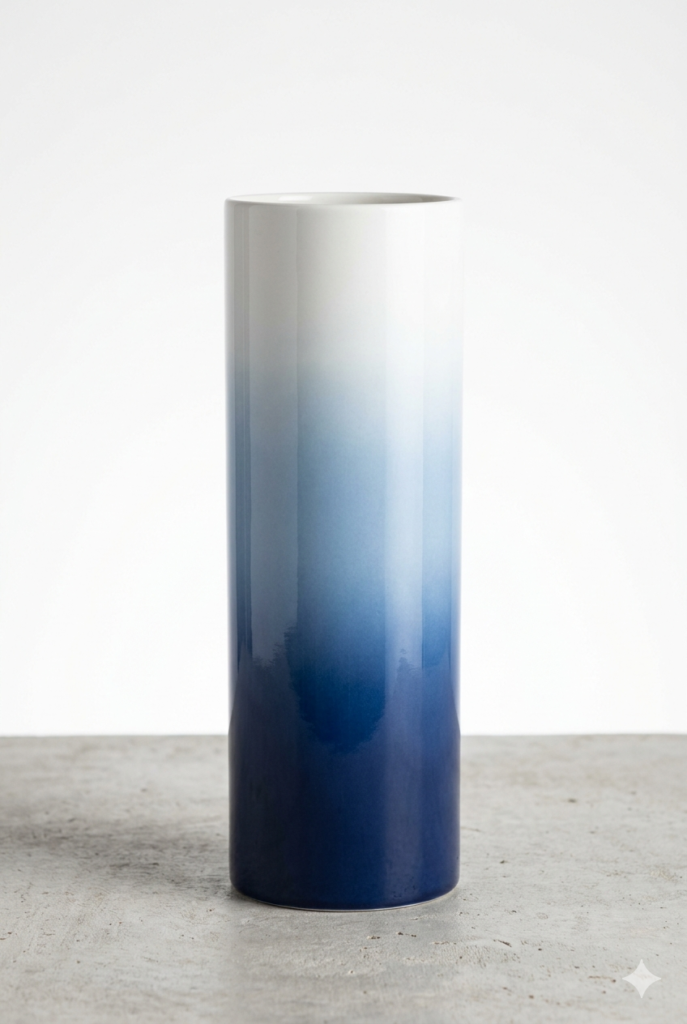
6. Ombre and Gradient Wash
An ombre effect looks incredibly professional and is easier than it seems. Wet your ceramic surface slightly, apply your darkest color at the bottom, your lightest at the top, and blend in the middle with a damp brush before it dries. The result looks like a sunset on a vase.
Best for: tall vases, cylinder planters, candle holders
Pro tip: Work quickly — ceramic paint dries fast. Have a damp brush ready to blend immediately after applying both colors.
What you need:
7. Gold and Metallic Accents
Gold paint elevates any ceramic instantly. Use it to outline rims, trace geometric shapes, or add thin line details over a solid base color. Even a single gold stripe around the rim of a matte black mug looks luxurious and sells well.
Best for: mugs, vases, decorative bowls, trays
Pro tip: Apply metallic paint last, after your base color is fully cured. Metallic paints are thin — two thin coats look better than one thick coat.
What you need:
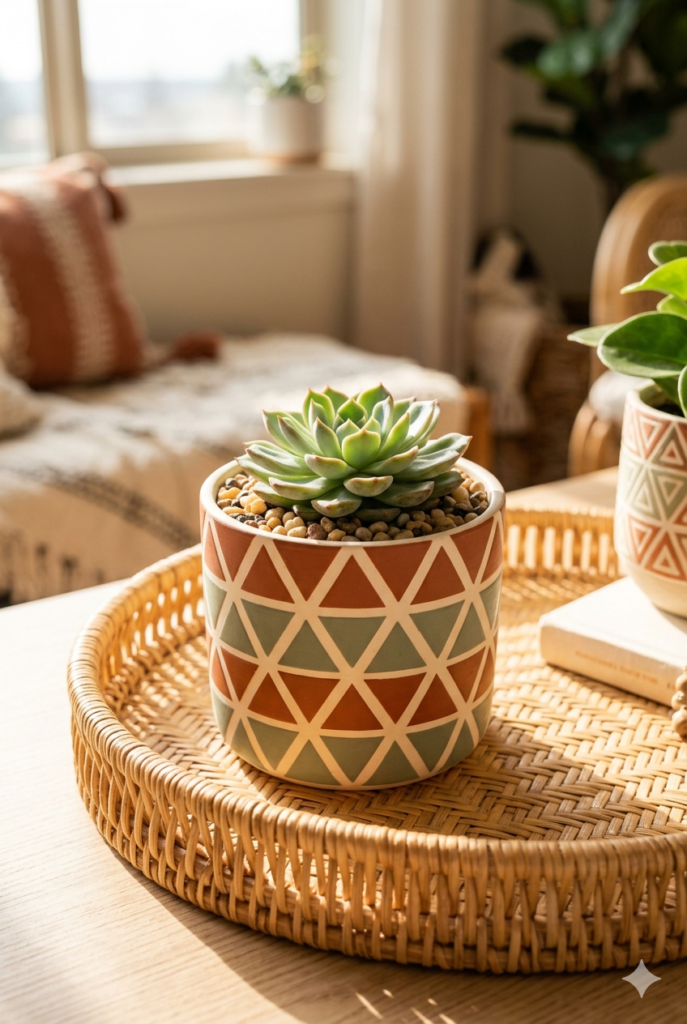
8. Boho Geometric Triangles and Diamonds
Geometric patterns are huge in home décor right now. Tape off triangles, diamonds, or chevron stripes and fill with earthy tones — rust, cream, sage, and terracotta. This style photographs beautifully and has strong resale appeal.
Best for: vases, planters, wall-hanging ceramics
Pro tip: Use thin washi tape to mark your pattern. It peels cleanly without pulling up dried paint underneath.
What you need:
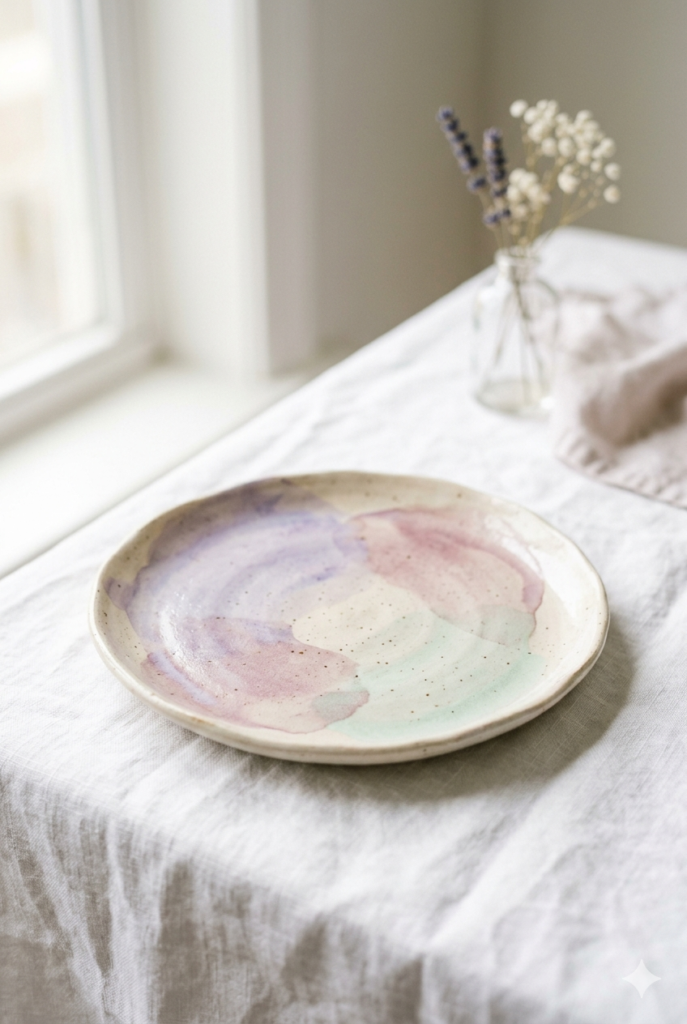
9. Watercolor-Style Soft Washes
Dilute your ceramic paint heavily with water to create translucent, dreamy washes that let the clay texture show through. Layer 2-3 soft washes in complementary colors for a peaceful, artistic look that’s perfect for home décor.
Best for: decorative plates, shallow bowls, vase exteriors
Pro tip: Test your dilution ratio on a paper towel first — you want the paint almost transparent, just a whisper of color.
What you need:
10. Stamped Textures with Sponges
Cut a kitchen sponge into any shape — circle, leaf, star — and use it to stamp repeating textures across your ceramic. Two colors, one sponge, and 20 minutes. This technique creates linen-like or stone-like textures that look high-end at zero cost.
Best for: large planters, decorative vases, canister sets
Pro tip: Blot excess paint off the sponge on a paper plate before stamping. Too much paint = blobby edges.
What you need:
11. Black and White Graphic Patterns
Black and white never goes out of style. Stripes, checkerboard, organic line drawings, or bold graphic shapes in just two colors make a strong visual statement. This style photographs particularly well and fits any home aesthetic.
Best for: mugs, vases, storage jars
Pro tip: Start with a white base coat. Once fully dry, apply black patterns. The white base makes black appear richer and prevents the clay color from interfering.
What you need:
12. Nature-Inspired Leaf and Branch Prints
Press real leaves or branches lightly into soft clay or use them as paint stamps on fired pieces. The organic shapes create beautifully irregular patterns that are impossible to replicate exactly — which is what makes them feel handmade and special.
Best for: decorative plates, shallow bowls, plant saucers
Pro tip: Gather fresh leaves (not dry ones — they crumble). Coat the veined underside with paint and press firmly but gently for 10 seconds.
What you need:
13. Constellation and Star Maps
Dark blue or black base with white and silver dots — constellation ceramics are stunning, unique, and impossible to find in regular stores. Map out a real constellation or create your own star pattern. These make incredible personalized gifts (birthday constellations, anniversary star maps).
Best for: mugs, large plates, decorative bowls
Pro tip: Use a toothbrush loaded with white paint and lightly flick it across the dark base for a realistic “galaxy splatter” background before adding your constellations.
What you need:
14. Terrazzo-Inspired Multicolor Chips
Terrazzo is one of the biggest home décor trends right now — and it translates beautifully to ceramics. Apply a neutral base (white, cream, or light gray), then use a thin brush to scatter small colorful chips in irregular shapes across the surface. The result looks like expensive designer pottery.
Best for: planters, trays, coaster sets
Pro tip: Keep your color chips small and irregular — the less uniform they are, the more they resemble real terrazzo stone.
What you need:
15. Minimalist Single-Line Art
One continuous line drawn in black over a white base creates modern, gallery-worthy art. A face, an animal, a plant — the simplicity is the entire aesthetic. This style is trending heavily right now and requires only a paint pen and a steady hand.
Best for: vases, mugs, decorative tiles
Pro tip: Practice your line drawing on paper 10-15 times before committing to the ceramic. The goal is one clean, confident stroke — no sketching first.
What you need:
Quick Reference: Which Technique Is Right for You?
| Technique | Skill Level | Best For | Time |
|---|---|---|---|
| Color Blocking | Beginner | Modern décor | 30 min |
| Dots & Patterns | Beginner | Gifts, mugs | 45 min |
| Sponge Stamping | Beginner | Large pieces | 30 min |
| Abstract Strokes | Intermediate | Artistic décor | 1 hour |
| Hand-Painted Florals | Intermediate | Gifts, vases | 1-2 hours |
| Gold Accents | Intermediate | Luxury look | 45 min |
| Constellation Art | Intermediate | Unique gifts | 1.5 hours |
| Single-Line Art | Advanced | Gallery pieces | 1 hour |
| Personalized Text | Any level | Custom gifts | 1 hour |
The #1 Mistake Pottery Painters Make
Skipping the sealer. You can spend two hours on a beautiful piece and watch the paint chip off in a week without a proper topcoat. Always finish with a ceramic-compatible sealer — these are the best ceramic sealers on Amazon based on reviews from pottery painters.
Ready to Start?
The best pottery painting kit for beginners that covers most of these techniques:
➡️ Shop complete pottery painting kits on Amazon →
Which technique are you trying first? Drop it in the comments — I read every one.
This post contains affiliate links. As an Amazon Associate, I earn from qualifying purchases at no extra cost to you.
Looking for more creative DIY ideas? Browse all our guides for inspiration on your next handmade project.